The GCs Guide to Construction Vibration Monitoring Equipment
An overview of construction vibration monitoring and equipment: when, why, benefits, how to implement, available sensors and platforms.
Last Updated: 1-8-2024
Last Updated: 9-10-2025
What is Construction Vibration Monitoring?
Construction vibration monitoring is the process of measuring and tracking vibrations caused by construction activities (like pile driving, compaction, blasting, or heavy equipment use) to ensure they don’t damage nearby structures, disrupt sensitive equipment, or disturb occupants.
Why It’s Important
Prevents structural damage to nearby properties.
Provides legal and compliance documentation for contractors and owners.
Helps with community relations, since nearby residents and businesses can be assured that activities are being monitored.
Allows real-time alerts so contractors can adjust methods before exceeding safe limits.
When is vibration monitoring important in construction?
Before and during high-energy activities: Pile driving, dynamic compaction, blasting, demolition, or even heavy equipment movement can produce ground vibrations capable of damaging nearby structures or sensitive equipment.
In dense or urban settings: When work is close to occupied buildings, utilities, bridges, transit tunnels, or historic landmarks, vibration monitoring helps ensure compliance with stricter limits.
Around sensitive facilities: Laboratories, hospitals, data centers, and manufacturing plants often house vibration-sensitive equipment; even small vibrations can disrupt operations.
When required by contract or permit: Many public agencies and owners specify vibration limits and require documented monitoring for compliance and liability protection.
Why is vibration monitoring important in construction?
Protects structures: Ensures construction activity stays below damage thresholds, avoiding costly repairs or claims.
Protects people and operations: Prevents excessive vibration that can disturb occupants or disrupt sensitive processes.
Legal and insurance defense: Provides a defensible record showing the contractor operated within established limits if a damage claim arises.
Real-time decision-making: Alarms alert the team to adjust construction methods before a violation occurs.
Stakeholder confidence: Demonstrates transparency and care to owners, neighbors, and regulators, improving community relations.
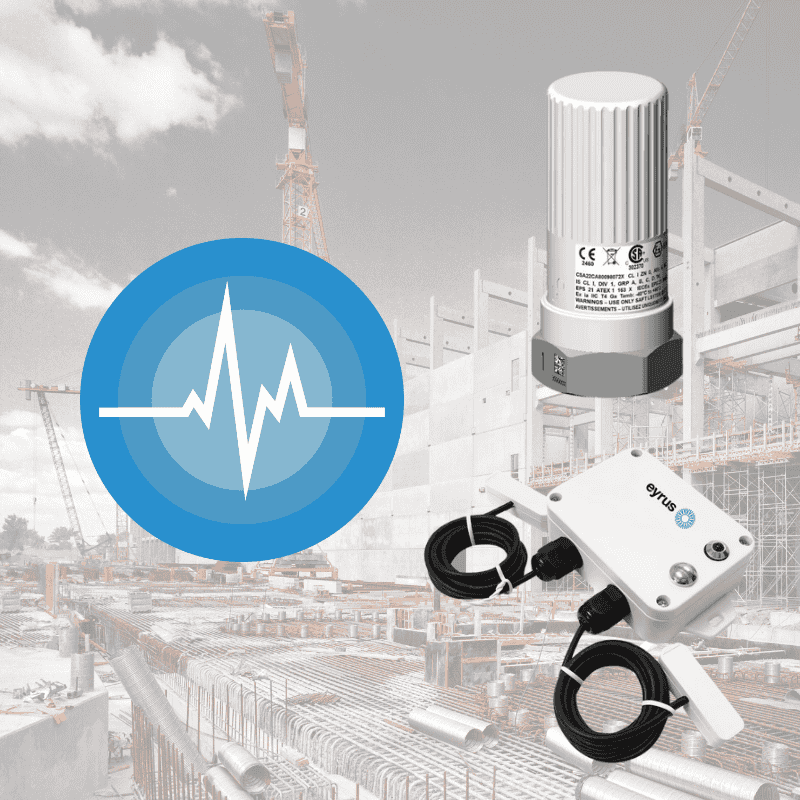
What kind of construction vibration monitoring equipment is readily available?
There are many types of vibration monitoring equipment available for construction sites. Here are the easiest, most effective, and most cost effective sensors available:
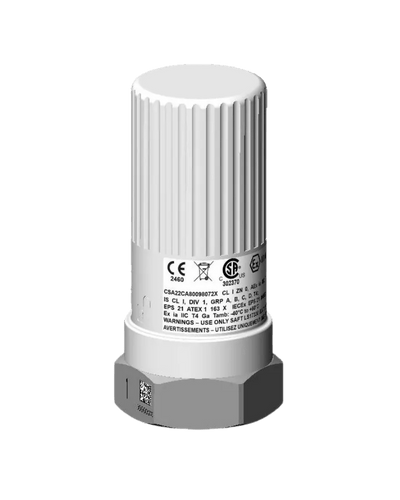
Top Pick: Triaxial Accelerometer for Construction Vibration Monitoring
A triaxial accelerometer (often called a “tri-axis” sensor) is valuable in construction vibration monitoring because it can detect vibration in all three spatial directions at once—vertical, longitudinal, and transverse—right where the sensor is mounted.
Cost: About $1,000 per sensor.
Here's why it's the top pick:
A triaxial accelerometer is relatively in-expensive, gives a complete, standards-compliant, and highly sensitive measurement of construction vibration with simple deployment—ideal for projects where accuracy and defensibility of data are important.
1. Captures the Full Vibration Signature
Construction vibrations propagate differently through soil and structures depending on direction. A single-axis sensor might miss significant motion on another axis. A triaxial accelerometer records the complete 3-D motion, so you know the true magnitude and frequency content of vibration, not just a slice of it.
2. Compliance With Standards
Most widely used guidelines (DIN 4150-3, USBM, ISEE, etc.) assume you’re measuring Peak Particle Velocity (PPV) on all three axes and then using the highest of the three to check against limits. A triaxial accelerometer (or geophone) lets you do this in one instrument, making it easier to comply with standards and produce defensible reports.
3. Higher Sensitivity and Frequency Range
Accelerometers can offer very wide frequency bandwidths compared to some geophones. That’s especially useful for:
High-frequency vibration from small equipment or high-impact tools.
Low-amplitude vibration in sensitive areas (labs, hospitals, data centers).
This means you can pick up both subtle and intense vibrations without swapping equipment.
4. Simplified Installation
With a single triaxial unit, you avoid mounting and wiring three separate single-axis sensors at 90-degree angles. This:
Saves time in the field.
Reduces mounting errors.
Improves consistency of the readings.
5. Direct Conversion to Velocity or Displacement
Modern triaxial accelerometers log acceleration data that can be digitally integrated to velocity and displacement. This gives you multiple metrics (acceleration, PPV, displacement) from one dataset—helpful for diagnosing potential damage, comfort issues, or equipment interference.
Cheapest Pick: 2-Gang Vibration Sensor – Rolling Ball Type
A “2-Gang Vibration Sensor – Rolling Ball Type” is a very simple, low-cost motion/vibration detector. It’s basically a small cylinder with a conductive ball inside that rolls and makes/breaks contact when shaken. In the context of construction vibration monitoring, it is good is an early-warning system, but not to log defensible compliance data. Here's why:
1. Low-Cost Early Warning
Rolling ball sensors are inexpensive compared to precision geophones or accelerometers.
They’re a practical choice for basic yes/no vibration detection on small or temporary projects, or as a “trigger” sensor to wake up more sophisticated equipment.
2. Simple Installation
Because it’s a self-contained switch, you can quickly mount it to equipment, structures, or enclosures without calibration.
No complex wiring or orientation is needed; it simply closes a circuit when vibration occurs.
3. Robustness
Rolling ball sensors tolerate dust, dirt, and rough handling better than some delicate MEMS accelerometers.
That makes them handy on a dusty, high-impact construction site where environmental conditions can be harsh.
4. Trigger or Threshold Applications
These sensors are often used to trigger data loggers, alarms, or cut-offs when any vibration above a rough threshold is detected.
You can put them on a generator, pump, or sensitive piece of gear to get a quick signal if vibration exceeds a certain point.
5. No Power-Hungry Electronics
Rolling ball sensors are essentially mechanical contacts. They consume virtually no power, which is good for battery-powered or wireless modules deployed for long durations.
Limitations to Be Aware Of
They do not measure actual PPV, frequency, or directional components—so they can’t on their own satisfy DIN 4150-3 or USBM RI 8507 compliance monitoring.
They’re best suited for qualitative “motion detected” applications or as a “go/no-go” warning, not for defensible structural vibration data.
Bottom line: a 2-Gang Rolling Ball sensor is “good” for simple, low-cost, rugged detection of vibration events on construction sites (especially as a trigger or alarm input), but it’s not a substitute for a calibrated triaxial geophone or accelerometer if you need quantitative, standards-compliant vibration monitoring.
The sensors only get you so far - you need some light software to set thresholds, generate alerts, log data, and produce reports.
How do you monitor construction vibration?
1. Select the Right Sensors
Use portable seismographs with triaxial geophones—the standard in construction vibration monitoring.
These instruments measure Peak Particle Velocity (PPV), frequency, and sometimes displacement or acceleration.
Choose units with internal data logging, wireless transmission, and battery backups if the site lacks power.
2. Identify Monitoring Locations
Conduct a pre-construction survey to locate at-risk buildings, utilities, or sensitive equipment.
Place sensors at the foundation or ground level of these structures, closest to the expected vibration source.
For long linear projects, set up multiple monitoring points to capture variations in soil and distance.
3. Establish Thresholds
Base vibration limits on applicable standards
Set both warning and alarm levels in the monitoring software to trigger alerts before limits are exceeded.
4. Configure Real-Time Alerts
Most modern systems can send SMS or email notifications when vibration levels approach or exceed thresholds.
Ensure the alerts go to a designated project manager or safety officer with authority to act.
5. Continuous Data Logging
Record vibrations continuously during high-energy work such as pile driving, blasting, compaction, or demolition.
Use time-stamped data to correlate vibration spikes with specific activities.
6. Active Mitigation
If vibration levels approach limits, adjust work methods: reduce equipment impact energy, change pile-driving techniques, or sequence operations differently.
Communicate these adjustments to the field team immediately.
7. Reporting and Documentation
Generate daily or weekly reports showing PPV graphs, exceedance events, and frequency content.
Share reports with stakeholders (owners, regulators, neighbors) as proof of compliance.
Keep records archived for legal or insurance purposes in case of damage claims.
Bottom line: You monitor construction vibration by combining properly placed, calibrated sensors with clear thresholds, real-time alerts, and regular reporting. This not only protects structures and people but also gives contractors defensible documentation that they stayed within agreed limits.
Where should you place construction vibration monitoring sensors?
1. At the Nearest Point to the Vibration Source and the Structure
Place sensors as close as possible to the point of concern on the structure’s foundation—typically at ground or basement level, on a rigid part of the building, not on loose soil or paving.
This captures vibrations the building is actually receiving, not just what’s in open ground.
2. On the Structure’s Most Vulnerable Elements
For sensitive or historic buildings, put sensors at corners, foundations, or structural elements where damage would first appear (e.g., masonry walls, arches).
If multiple elevations or wings exist, monitor each one separately.
3. Between the Construction Activity and the Asset
Sometimes you set up a “line of defense” sensor halfway between the vibration source and the building to see attenuation trends through the soil.
This is especially helpful on linear projects (road, rail, pipeline) where activities move along a corridor.
4. At Multiple Locations for Comparison
Use at least two or more monitoring points for larger jobs:
One on or near the structure to measure what it experiences.
One near the source (pile driver, compactor) to measure “as-generated” vibration.
This allows you to compare source vs. received vibration and model attenuation.
5. On Utilities or Special Equipment Foundations
If underground utilities, labs, hospitals, or data centers are present, install sensors directly above the utility alignment or on the equipment’s concrete slab to catch vibrations affecting them.
6. Proper Orientation and Mounting
Always mount sensors firmly to a solid surface with anchors or spikes; loose placement on soil or asphalt will skew readings.
Align triaxial geophones properly (vertical, transverse, longitudinal) to match the direction of wave propagation.
Quick Checklist for Placement
✅ Identify at-risk buildings/equipment first.
✅ Place sensors at ground/foundation level, not upper floors.
✅ Ensure rigid attachment for accurate readings.
✅ Use multiple points to track attenuation from source to structure.
✅ Keep sensors in place for the duration of the vibration-causing activity.
What are common construction vibration limits or standards in the US?
1. USBM RI 8507 – “Blasting Vibrations and Their Effects on Structures”
This classic U.S. Bureau of Mines research bulletin is widely used beyond blasting for general construction vibration limits.
It gives recommended Peak Particle Velocity (PPV) thresholds for “safe” levels on typical residential structures at various frequencies.
Example “safe” PPV values:
0.5 in/sec (12.7 mm/s) at lower frequencies for very fragile structures.
Up to ~2.0 in/sec (50 mm/s) at higher frequencies for typical residential structures.
Many states and local agencies base their specs on this curve.
2. Federal Transit Administration (FTA) – “Transit Noise and Vibration Impact Assessment”
Used to evaluate vibration impacts from rail and large infrastructure projects.
For human comfort and sensitive equipment, it sets vibration levels in VdB (velocity decibels) rather than PPV.
Typical screening thresholds:
65 VdB for highly sensitive buildings like hospitals or labs.
72 VdB for residences.
75–80 VdB for workshops or industrial spaces.
3. DIN 4150-3 (Germany) – Adopted by Many U.S. Agencies for Non-Blasting Work
Provides PPV guidelines for different building categories:
3–5 mm/s (0.12–0.2 in/s) for extremely sensitive or historic buildings.
8–15 mm/s (0.3–0.6 in/s) for residential structures.
20–50 mm/s (0.8–2.0 in/s) for industrial buildings.
Even though it’s a German standard, many U.S. owners specify it because it’s clear and widely accepted.
4. State DOT / Local Specs
Many states publish their own vibration limits for highway, bridge, and tunnel work.
Typical ranges:
0.5 in/sec (12.7 mm/s) for older/historic structures.
1.0 in/sec (25 mm/s) for normal residential/commercial.
2.0 in/sec (50 mm/s) or higher for industrial buildings.
Always check the project’s special provisions or environmental documents.
5. Project-Specific or Owner-Specific Criteria
Hospitals, data centers, and research labs often issue their own vibration limits—sometimes far tighter than public standards—to protect sensitive equipment like MRI machines, electron microscopes, or servers.
These can be on the order of 0.1 in/sec PPV or lower, or specified as RMS velocity in VdB.
Key Takeaways
In the U.S., USBM RI 8507 is still the baseline for structural safety, while FTA guidelines and sometimes DIN 4150-3 handle human comfort and sensitive equipment.
Typical PPV limits range from 0.12 in/sec (3 mm/s) for historic buildings up to 2.0 in/sec (50 mm/s) for robust industrial buildings.
Always use the highest PPV of the three axes (vertical, longitudinal, transverse) for compliance.
Confirm project-specific specs before you start—owners and agencies can tighten them.
What are common vibration limits around hospitals, data centers, research labs, and other sensitive buildings?
Here’s what’s typical for vibration limits around hospitals, data centers, and research labs in the U.S. These facilities usually set their own criteria—often much tighter than general construction standards—because they house sensitive occupants or equipment.
1. Hospitals
Goal: Protect patients (especially in critical care or operating rooms) and sensitive diagnostic equipment like MRI, CT, or ultrasound machines.
Typical Limits:
≤ 0.1–0.2 in/sec (2.5–5 mm/s) PPV for structural safety near patient areas.
65–70 VdB for human comfort and sensitive spaces, based on FTA or ANSI vibration criteria.
Some hospital design specs even call for VC-A or VC-B vibration criteria (see below) for equipment areas.
2. Data Centers
Goal: Prevent disruptions to server racks, high-density storage, or cooling systems. Even small vibrations can create read/write errors or premature wear.
Typical Limits:
≤ 0.1 in/sec (2.5 mm/s) PPV at server floor slabs.
Many owners specify vibration levels as root-mean-square velocity per the VC (Vibration Criteria) curves—often VC-A or VC-B.
VC-A corresponds to about 2,000 µin/sec RMS (≈50.8 µm/sec), VC-B about 1,000 µin/sec RMS (≈25.4 µm/sec).
3. Research Labs (Universities, Pharma, Microelectronics)
Goal: Protect high-magnification microscopes, lasers, or precision manufacturing tools that are extremely vibration sensitive.
Typical Limits:
≤ 0.05 in/sec (1.25 mm/s) PPV or tighter.
Use VC-C to VC-E curves for ultra-sensitive equipment:
VC-C: 500 µin/sec RMS (≈12.5 µm/sec)
VC-D: 250 µin/sec RMS (≈6.3 µm/sec)
VC-E: 125 µin/sec RMS (≈3.2 µm/sec)
These criteria are from the widely adopted “Vibration Criteria” curves by Colin Gordon & Associates used in lab and high-tech facilities. Many U.S. hospitals, data centers, and labs embed these in their specs.
Key Takeaways
Standard construction limits like USBM RI 8507 or DIN 4150-3 (0.3–2.0 in/sec PPV) are usually too loose for hospitals, data centers, and labs.
These facilities often require 0.05–0.2 in/sec PPV or less, or specify VC curves in µin/sec RMS.
Always request the owner’s project-specific vibration criteria up front—they often exceed public agency limits.
Use triaxial sensors and high-resolution data logging to ensure you can detect such low thresholds.
.png)
.png)